Responsive Image Map WordPress Plugin
-
Apartment Complex -
Apartment Community -
Business Center -
Real Estate Auction -
Office Space for Rent -
Lot Sales Map -
Residence Complex
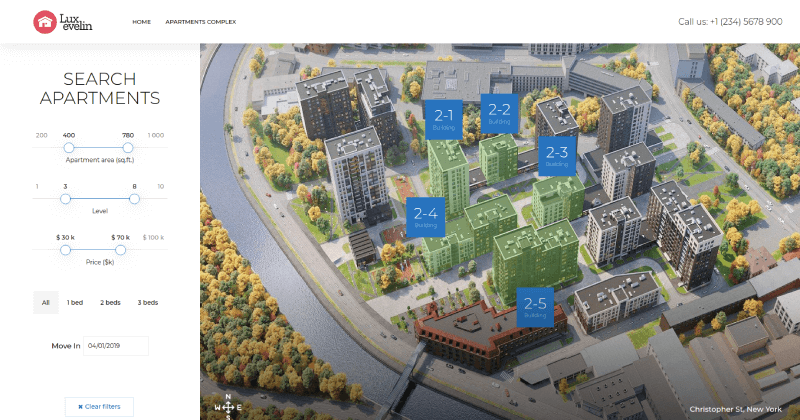
Availability info
Every time when any filter changed – automatically changed SVG colors and calculated all counts on image map.
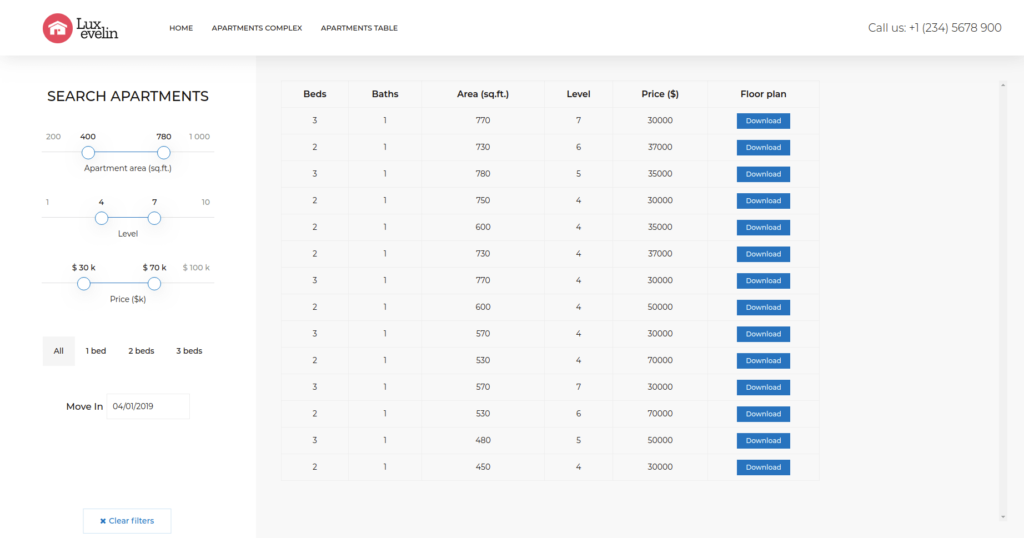
Table with any fields
All types of apartment parameters can be configured in backend. After this all templates and filters need to configure for using this fields.
Filtering by any fields
Types of possible filters: number range slider, radio buttons, checkboxes, dropdown and datepicker.
Full power of page builder for creating interactive image map in WordPress
-
Builder ready for making pixel-perfect design -
Rich settings for colors & typography inside image map -
110+ elements for using inside image map -
Unlimited nested layouts inside image map
Based on AZEXO Shopify Page Builder
AZEXO is a front-end page builder for pixel perfect professional design on Shopify platform. It allow build custom landing, product, and blog pages. Editor allows you to optimize the page layout for mobile, tablet and laptop.
Step 1: Prepare your image
For creating interactive map you can use any image with enough resolution. For example you can make image with some 3D rendering software. In most cases map need big image – so do not forget reduce image width not more than 3000 pixels and use some image compression software like tinyjpg.com.
Step 2: Place image in builder
You need to use “free-positioning” element for creating map. After you added it on page, open elements settings panel and open “Background” section there. Select background type “Classic” and click on “Background image” button. After this you will see image library dialog window where you can upload your image and select it.
Step 3: Image position and size
When you selected image for background of “free-positioning” element in most cases it will have incorrect position and size for creating map. Select “Position”=”Center Center” and “Size”=”Cover” – in this case your image will be centered and fill all available space.
Step 4: Build image map by mouse
The plugin allows you to create an SVG in WordPress with a mouse and place it on an image map. In order to add SVG to the image map, click on the “plus”-button and select “polygone-with-tooltip.htm” in the “free-positioning” section. In order to switch to the editing mode of the SVG, click with the left mouse button. When creating SVG, you can zoom in on the image with the mouse wheel and move it with the left button. SVG can have a tooltip with arbitrary content. You can set the colors of the SVG in the normal state and when you hover over the mouse.
https://dev.azexo.com/wp-content/uploads/2024/08/landing1.mp4https://dev.azexo.com/wp-content/uploads/2024/08/landing2.mp4
Step 5: Add tooltips to image map
Once you have added the “polygone-with-tooltip.htm” element to the image map, you can start customizing the tooltip. To do this, click on the “plus”-button. In the dialog that opens, there is a wide selection of elements that can be used. First of all, pay attention to the “Layout” and “Content” sections. The “Layout” section allows you to implement such important features as: horizontal output of elements, hyperlink and background fill. The “Content” section contains the standard elements for building a page: text, image, icon, etc. This way you can create an image map in WordPress with a very rich variety of design and information.
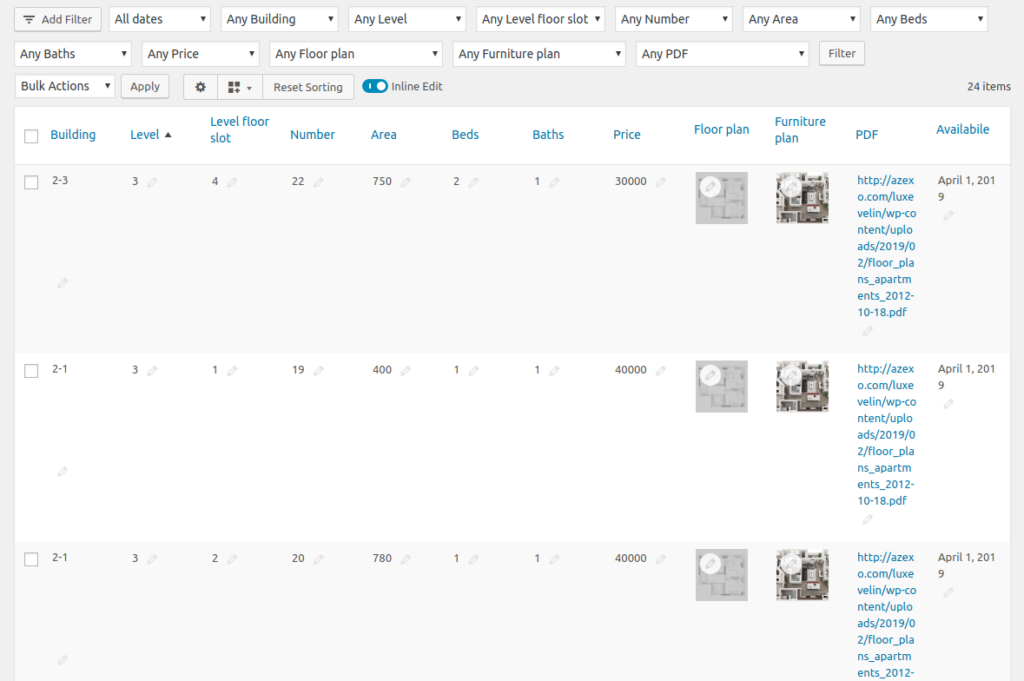
How looking apartments table in WordPress admin
Table implemented via WordPress custom post type. Which allow to use plugins like “Admin Columns”, “Advanced Custom Fields”, “wpDataTables”, “WP All Import”. Image map automatically filled by data from this table.
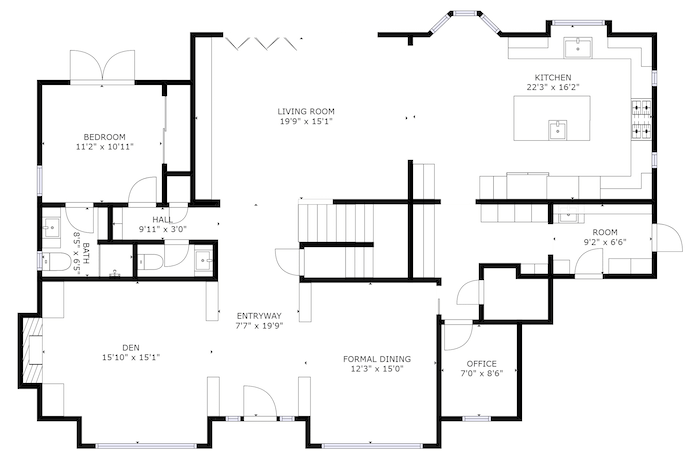
Floor plan demo
This WordPress plugin can be used not only for apartments presentation. In this demo showed simple image map which used for switch various content – it works like a tabs element.